OGT Expedition 2.0: Hard Mounting 100 watts of Solar.
The purpose of overlanding is to disconnect and get away from it all for a while, but doing that in the modern age can be tough. We have all become so used to modern convenience that we want to bring some of them along with us to make the trip more enjoyable. Running a fridge (or two), a furnace, LED camp lights, recharging the phone and/or camera batteries and listing to some tunes all require power. Out in the middle of nowhere the only real way to make power is with solar.
Solar power has advanced a good deal in the last decade and we now have several options for building a solar setup for mobile use when it comes to solar panel construction and types of charge controllers. However, we are still limited to two main options for deploying these setups: Freestanding and hard mounted.
Freestanding
The most popular of the freestanding type is the suitcase style panels. These are typically two panels that are connected in the middle by a hinge. This allows you to close the panels in on themselves so they can be packed away when not in use. Another area where the suitcase panels really shine is in their ability to be setup remotely. If you have long enough connecting wires, you can setup your panels so they are in direct sun light while your vehicle or trailer is parked in the shade (if there is any). You also have the ability to rotate the panels to follow the sun, giving them the most light to work with throughout the day. As with most things in life, this portability comes with a tradeoff. Every time you need to charge up your batteries, you have to pull the panels out and set them up and then connect them to the charge controller and they can only be charging while you are stopped. This might not seem such a big deal if you do a lot of base camping and in one spot for several days, but you need to evaluate what activities you do while base camping. If you mainly hang around the campsite then this is a great options for you. If you like to go off and explore, either hiking or driving, you are going to want to pack those panels away for safe keeping so that nobody decides to walk away with them. If you are packing them away during the daytime on a regular basis, then you lose a lot of the advantages of the portable setup.
Hard Mounted
Hard mounted panels come with their own set of pros and cons, which are really just the opposite of the suitcase style setups. Since they are physically attached to your vehicle or trailer, they can’t be placed out in the sun and rotated if you park in the shade. This means that even if you park in the sun, they are not going to be pointed in the optimum position for a good portion of the day. This is offset to a large degree (and maybe entirely depending on when you setup camp) by the fact that they will be producing power from the earliest rays of sun in the morning until the last rays of the evening. They will also be charging for hours on end while you are driving during the day. The risk of someone walking away with them is also greatly reduced while you are out exploring, adding even more time that they can be charging over a suitcase setup.
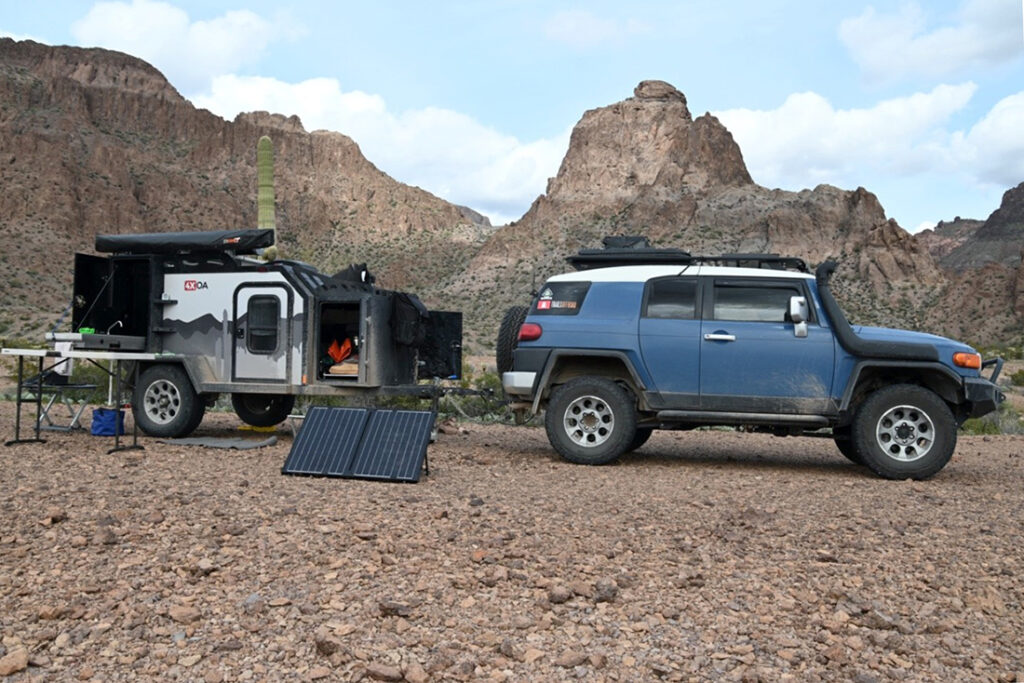
In the end it really comes down to how you overland or camp. If you are a setup camp and hang out type of person, the suitcase style is probably your best bet. If you are an overlander where you travel from place to place a lot on a trip, then hard mounting is the way to go. For me, hard mounting was the way to go since I like to travel from place to place each day.
Hard Mounting 100 watts of solar on an OGT Expedition 2.0
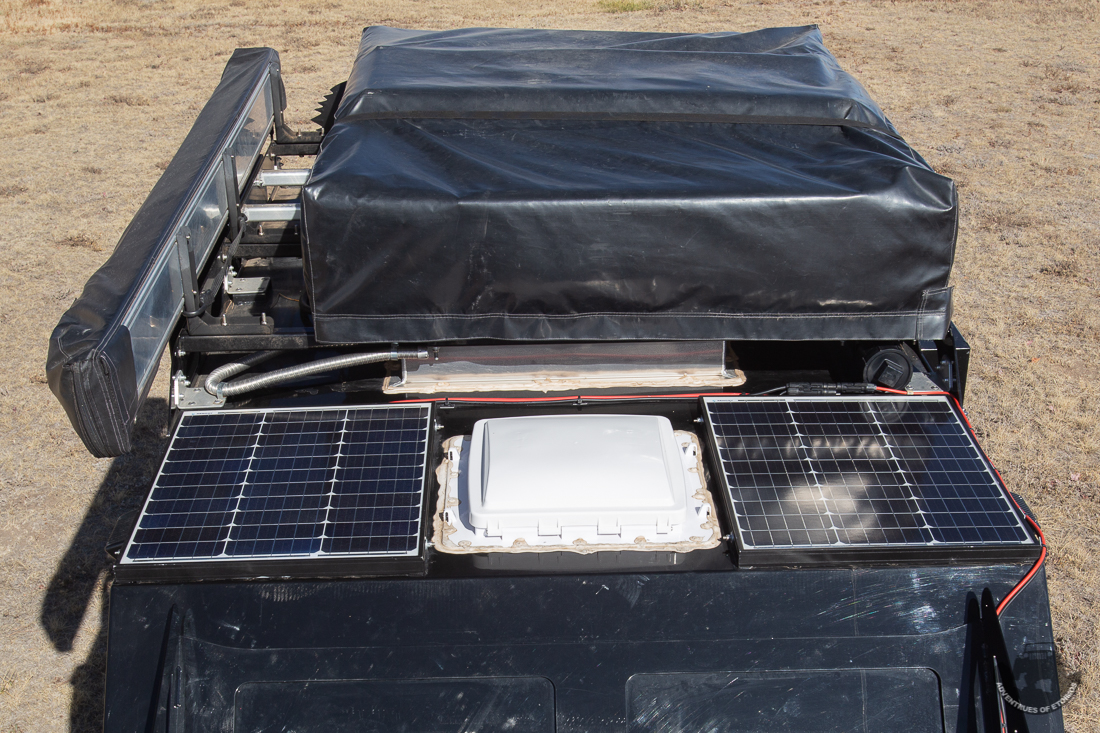
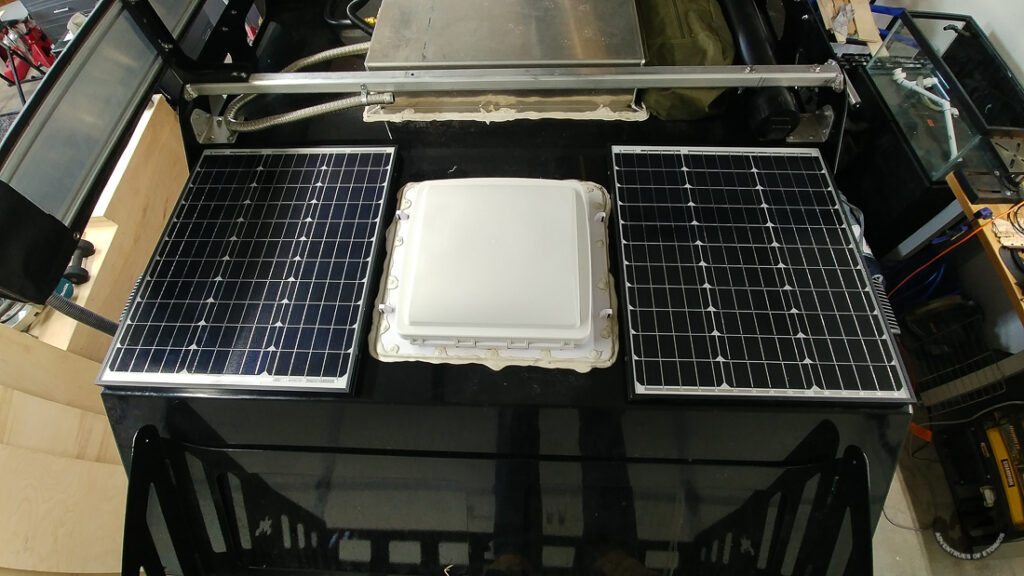
Once I decided to hard mount the panels, the biggest issue to solve was were to actually mount them on my trailer. If you do not have a roof top tent on your trailer, there is plenty of space on the roof rack to mount all the solar panels that you might need. If you are like me and need to run a RTT at least some of the time, then your choices of locations is rather limited. You could mount a panel flat on top of the front box, but then you lose that storage space. You could also mount it on the front slope of the trailer where the front box is, but again you lose some of that storage space and anything you place in there will partially block the panels. You can mount a panel under the roof rack on a slide so that you can deploy it when you are setup at camp, but then you might as well be using a suitcase style setup. With all these things taken into account, I decide the best option for me was to mount two 50 watt panels on either side of the roof vent. Renogy makes some nice 50w panels that fit perfectly to either side of the standard roof vent. I’m not sure if the upgraded vent is wider, so if you have that option be sure to double check that there is enough room up there for the panels.
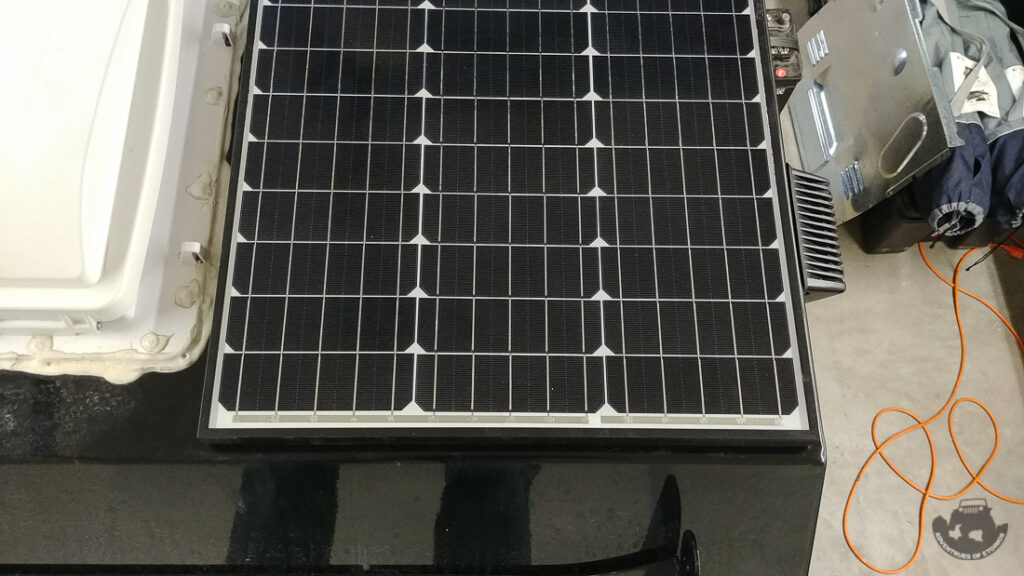
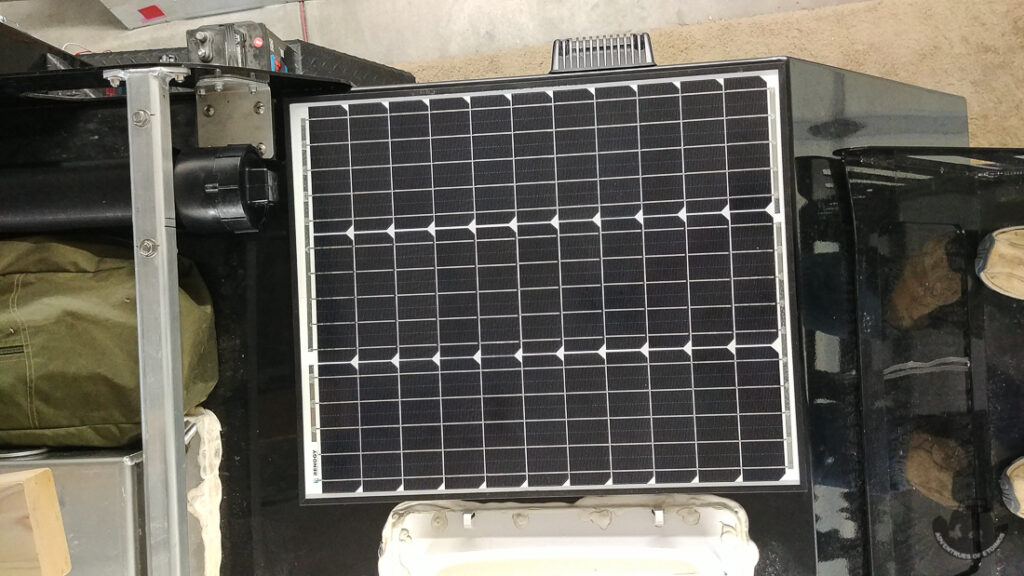
The one thing I did not like about these panels is that the frame is bare aluminum and the bright silver finish really stood out on top of the black roof. I solved this problem by spray painting the frames with black Plasti-dip. If you don’t know, aluminum does not take paint very well without a special primer being applied first. While there are some spray paints out there that will adhere to bare aluminum, they would probably not hold up well to offroad use over time. Plasti-dip is a thick, almost rubber like, paint substitute that forms a nonpermanent bond to whatever it is covering. It is a really unique product that can be easily removed when you want to, but otherwise withstands a lot of abuse without cracking, chipping or tearing. I’ve used it for years on the door hinges of my Jeep and it has held up very well to rocks hitting them and tree branches scraping against them.
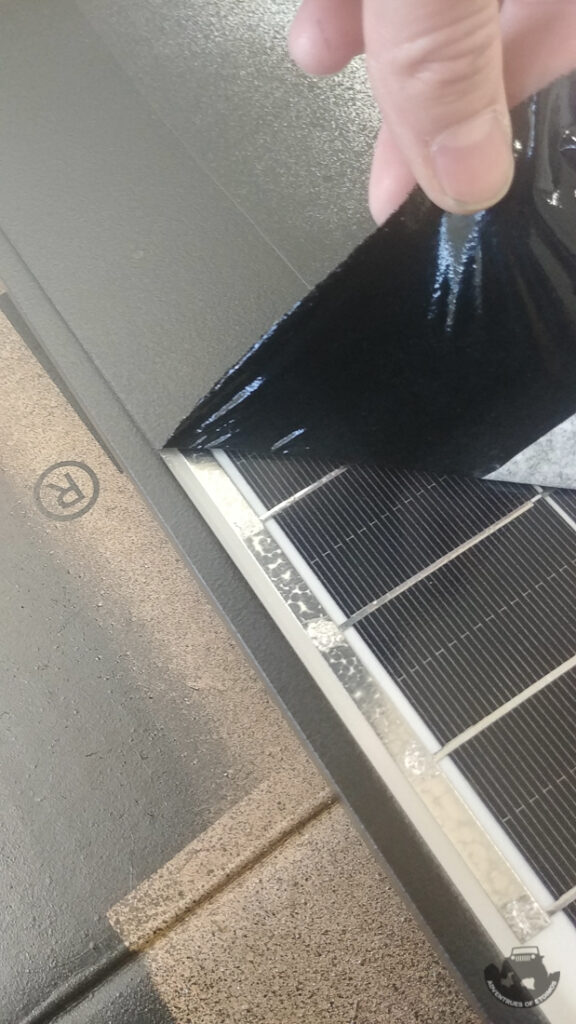
The process of Plasti-dipping them is pretty easy. First cover the center of the solar panels with masking tape, leaving about 2 inches next to the frame uncovered.
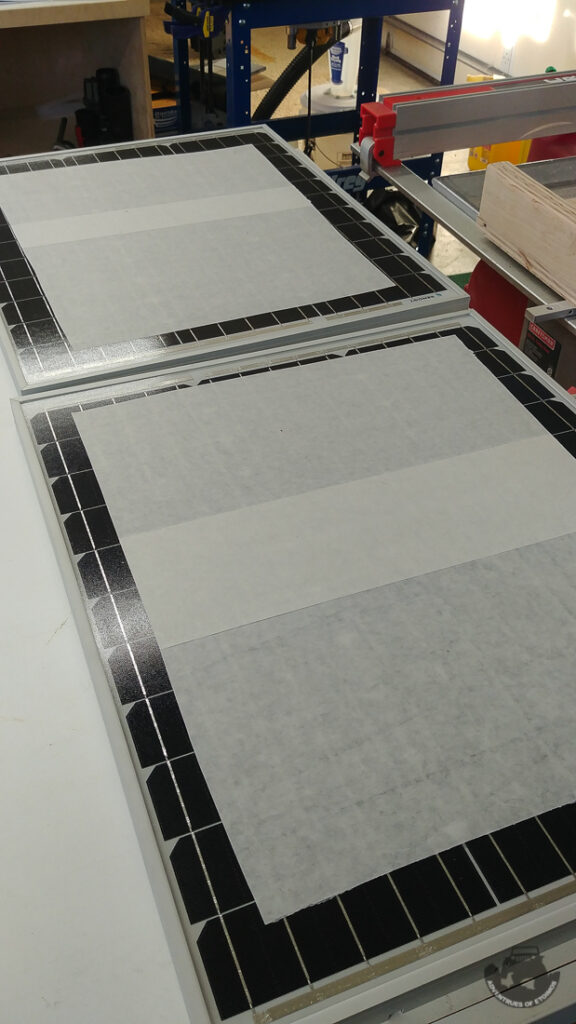
You want the frame and the surrounding area to be completely covered in the Plasti-dip, but by covering the center you will use less Plasti-dip and make it easier to start peeling the excess material off. Take your time spraying it on in thin, even coats. You want about 5 or 6 coats total for good coverage and protection.
Once it has dried all the way, you can start peeling the unwanted Plasti-dip away from the solar panel. Using the masking tape helps get it started.
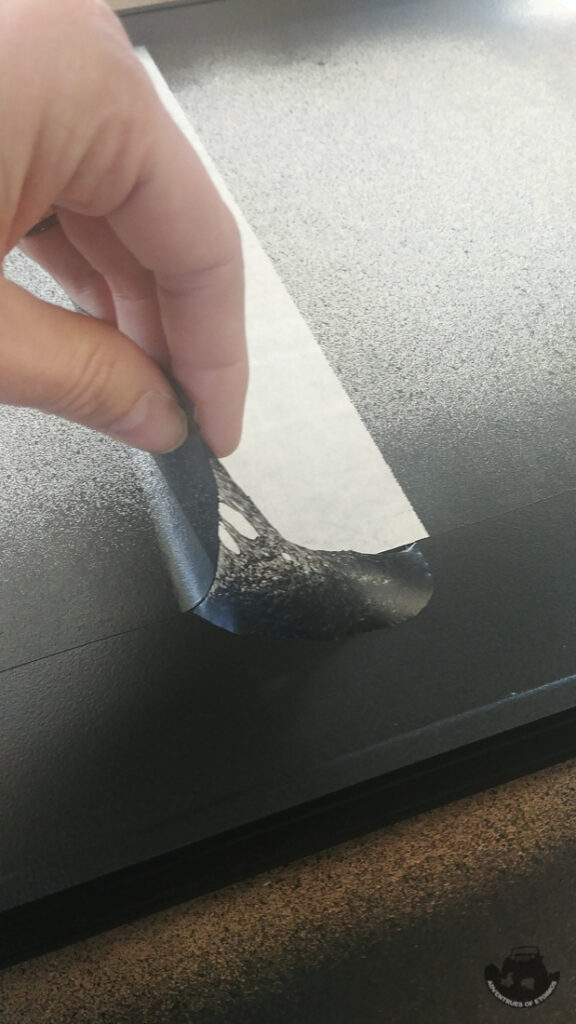
Once it starts to peel off, it will be like a thick film, pull it at an angle to the frame. The really cool thing about Plasti-dip is that it will tear off and conform to just about any change in surface height, wrapping around edges to give near perfect coverage and straight edges.
With the panel frames now blackened for a cleaner look, it is time to fab up the mounting hardware.
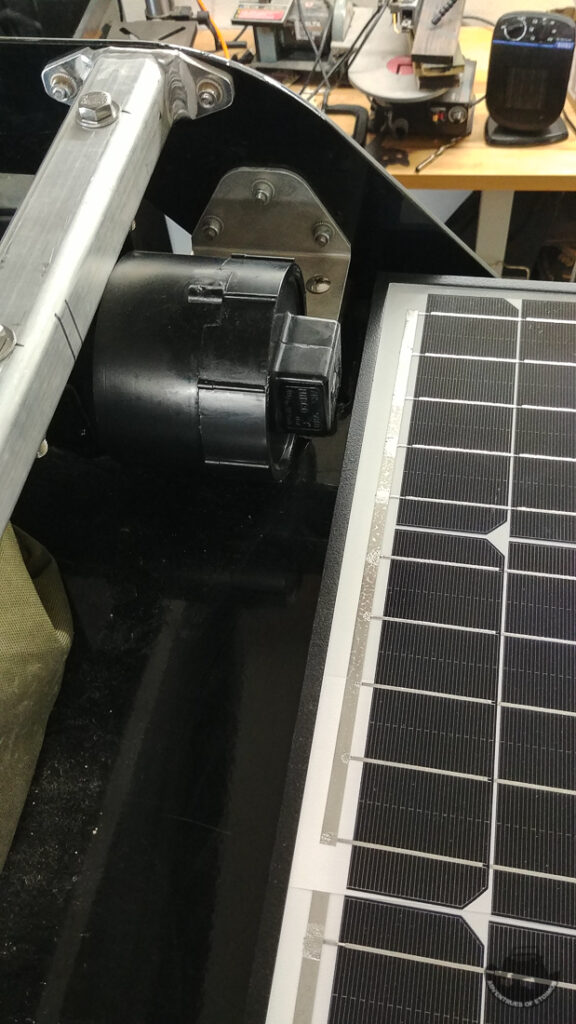
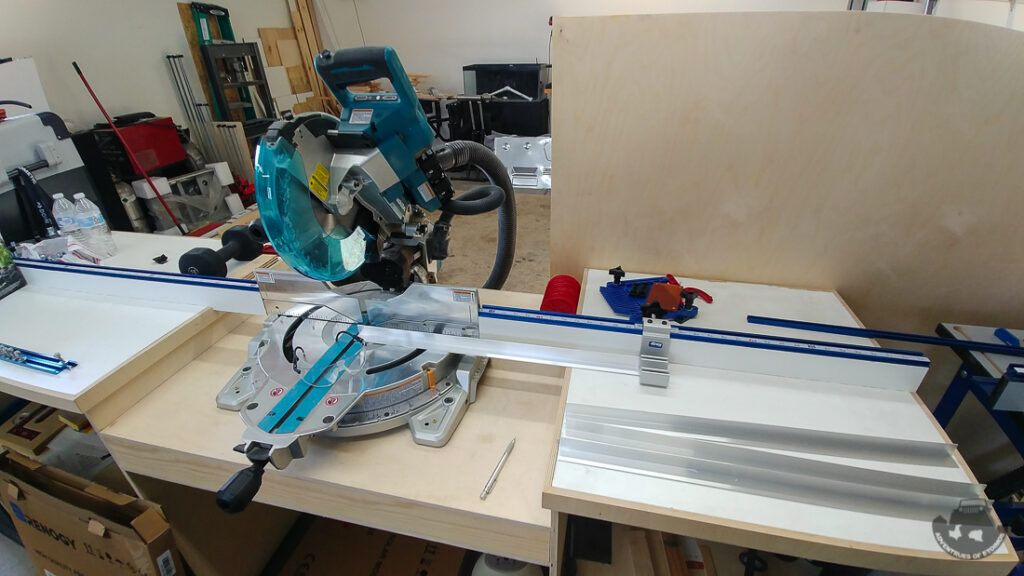
The method I chose was to use some aluminum angle and some T slot track I had laying around the shop. I cut the aluminum angle down to the length of the panels and then clamped it to the panel and the panel down to my work table. I could then drill four bolt holes through the aluminum angle and the panel frame and have them all lined up correctly.
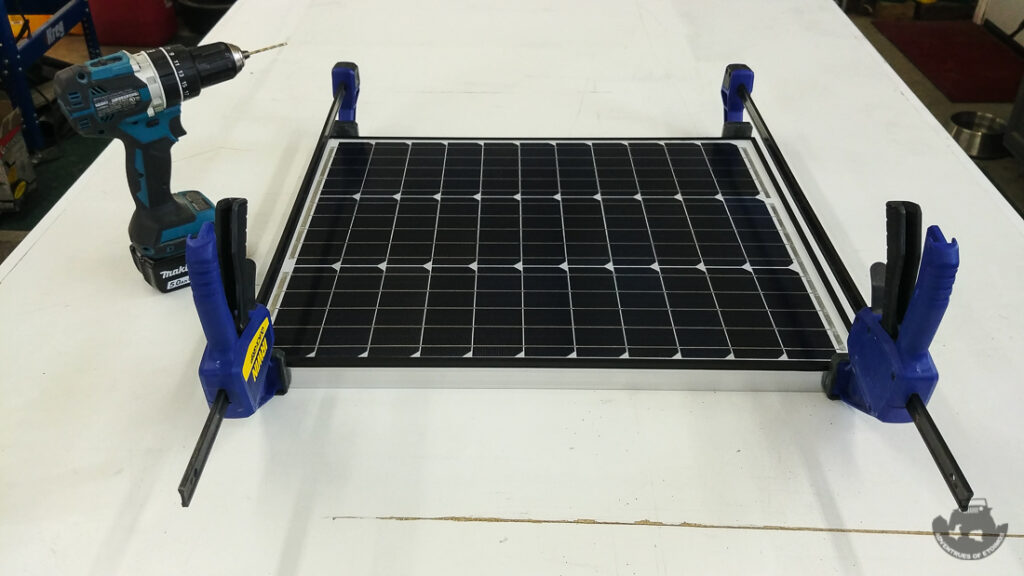
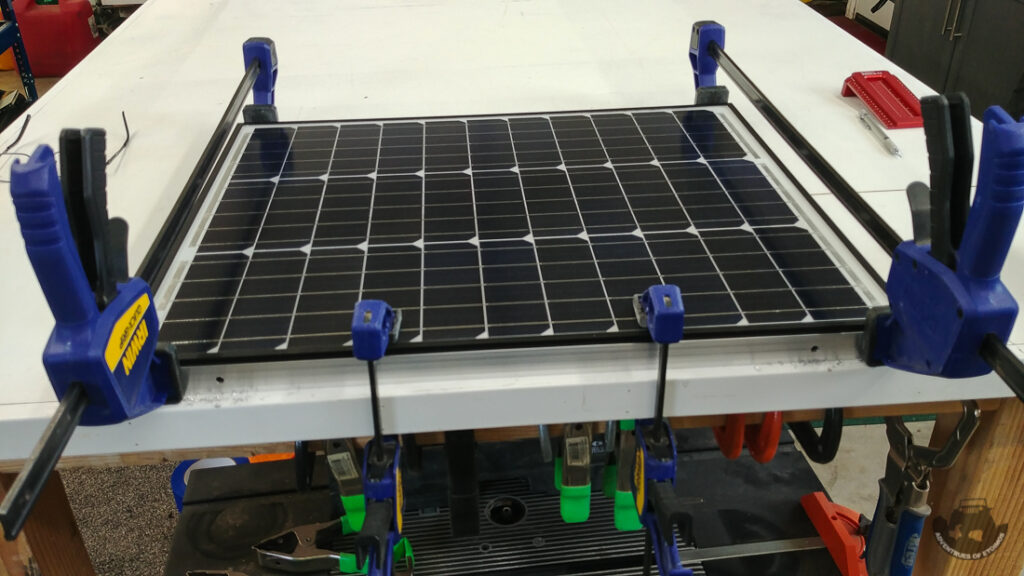
Once the holes were drilled in the aluminum angle, I then powder coated them gloss black to match the trailer top. I could have also Plasti-dipped those as well, but since I had the ability to powder coat them, I did. My leftover T Slot was used on the inside of the panels frame to clamp the panel to the aluminum angle. The aluminum angle would then be attached to the top of the trailer with Very High Bond tape.

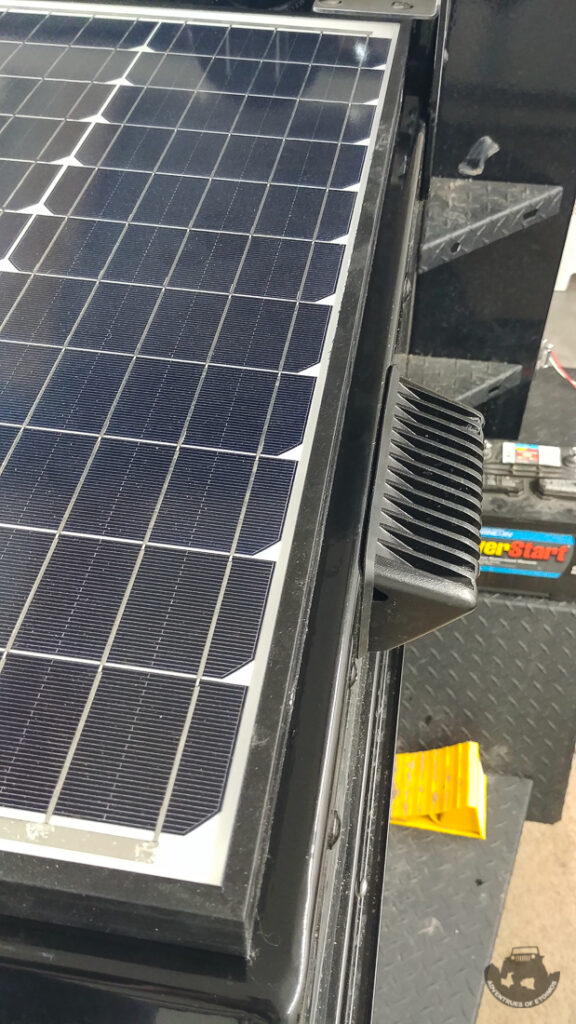
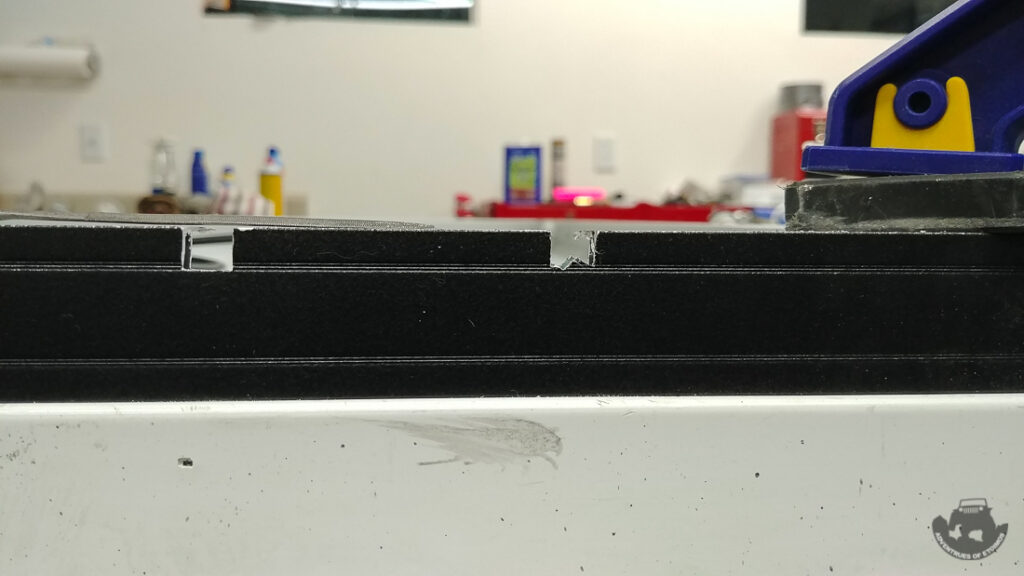
Once the mounting hardware was sorted out, it was time to cut some notches in the solar panel frames to pass the cables out to run them into the front box. To keep the notches small, I cut small triangle shapes out and then filled the bottom and side flat. I also put a bevel on the notches so that the cables would not get chaffed.
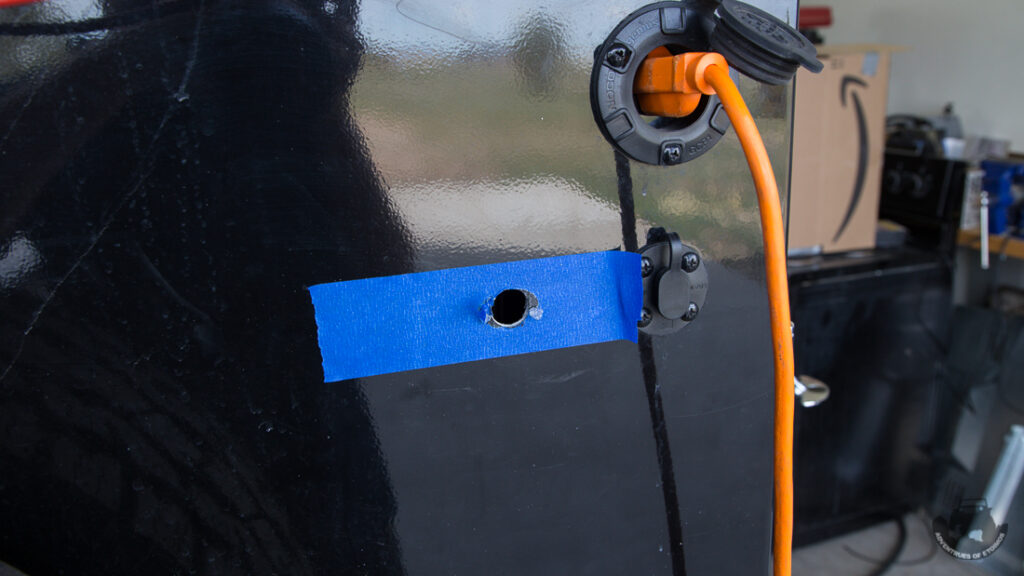
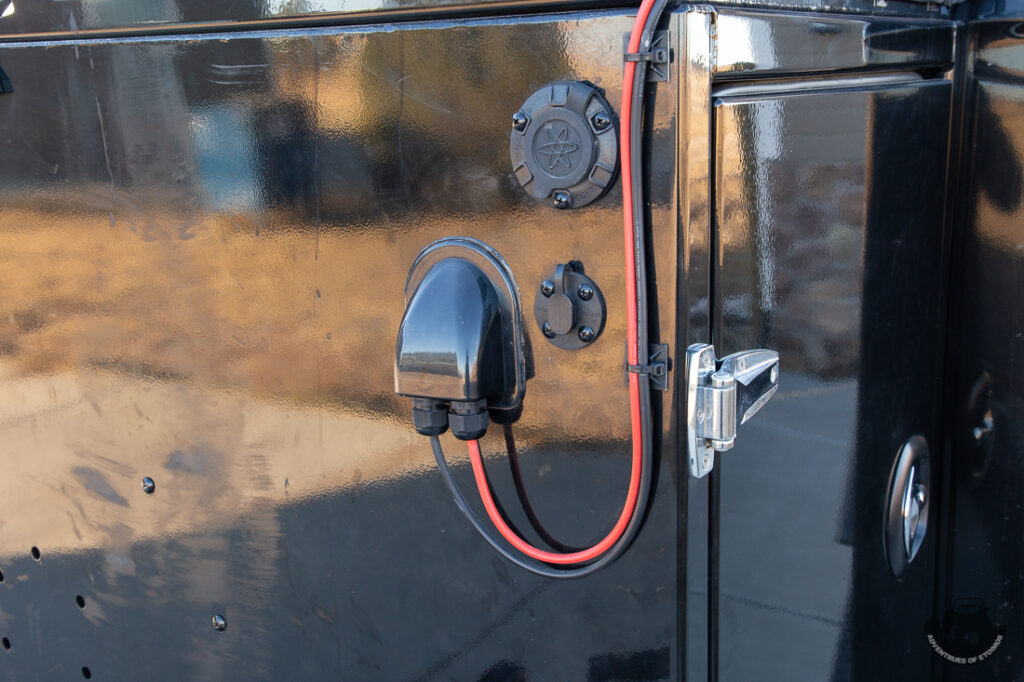
The Expedition 2.0 comes with an SEA connector on the front of the front box that the panels can be plugged into. However, I wanted to save that connection to use later if I want to get power in or out of the trailer. With that in mind I drilled a hole in the front box and installed a grommet to protect the cables going into the box.

Running the Cables
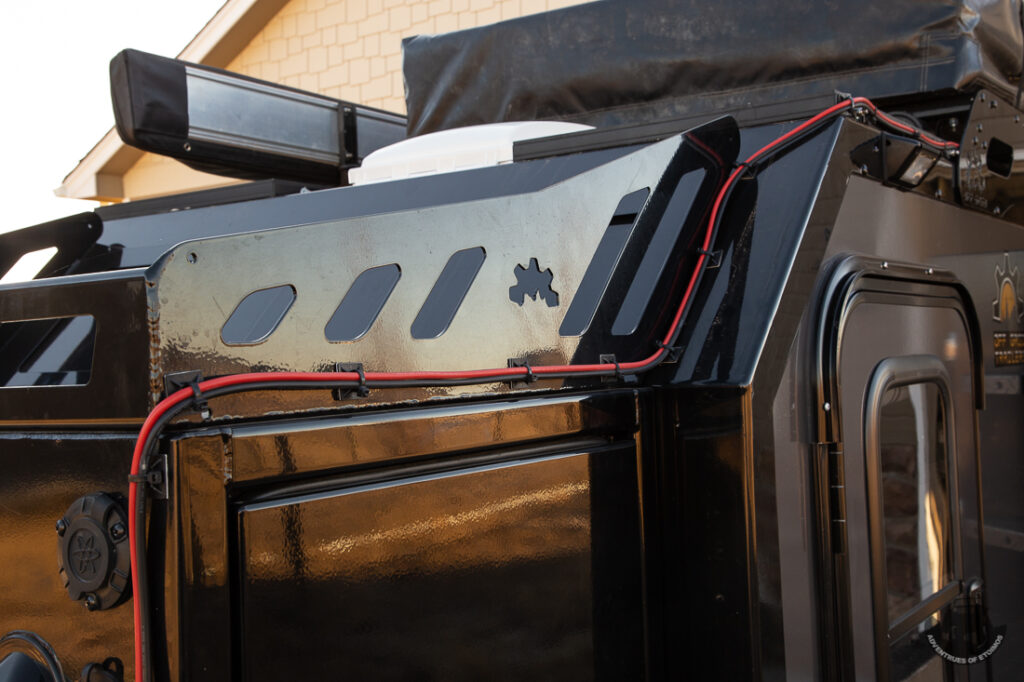
With the panels mounted and the hole into the front box it was time to run the wiring. The connectors on the passenger side panel was ran out of the notches that I had cut and then plugged into a short 3′ section of solar cable. This was in turn was connected to the driver’s side panel via some Y connectors. The other end of those Y connectors was plugged into a 10′ section of solar cable and ran into the front box. All of the cabling was secured using zip tie mounts.
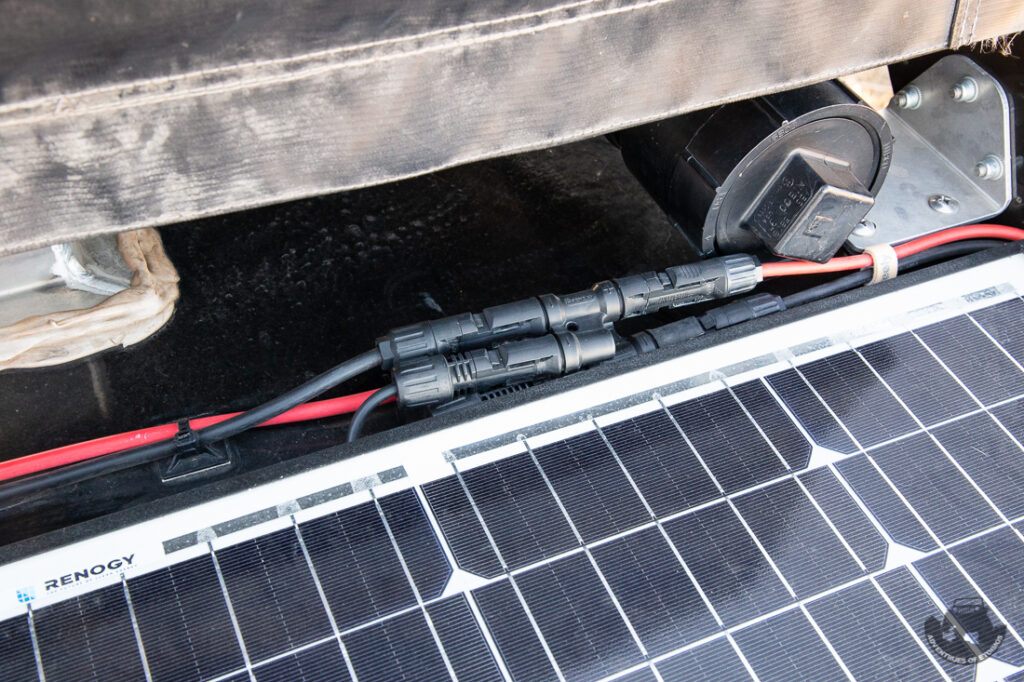
To keep the front box water proof, I used a cable entry gland where the cables entered. I also ensured that the cables had a “drip loop” in them before entering the gable gland.
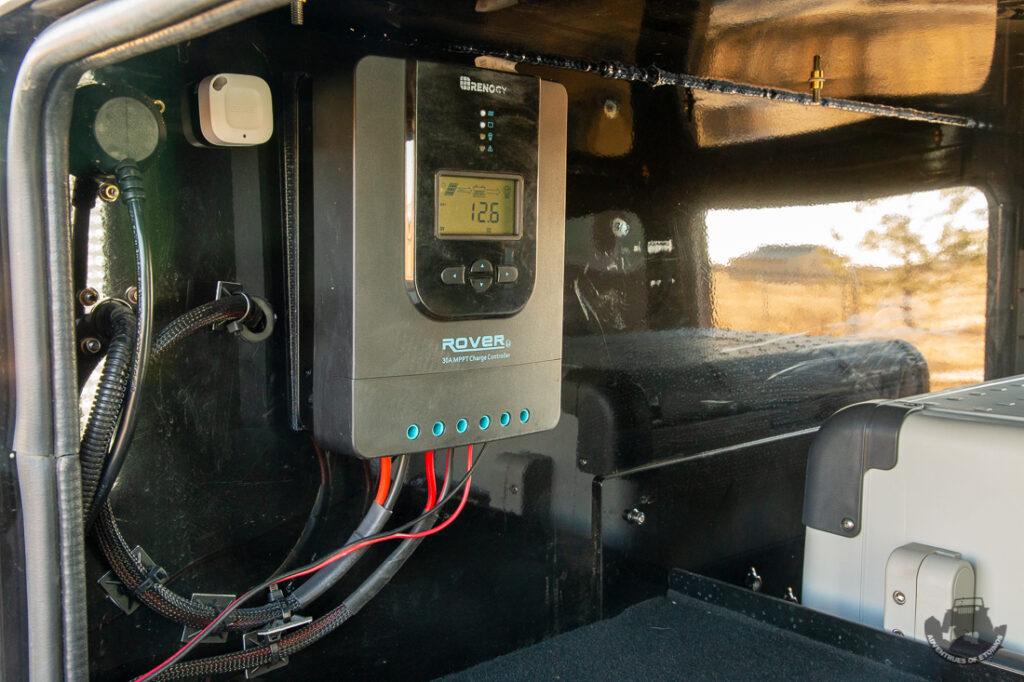
Another drip loop was used inside to make sure no spilt liquids could run down into the Renogy 30a charge controller. I went with a 30a controller so I could add more panels in the future if I needed to.
Back to the future
As I mentioned above, I wanted to make sure that I could add in more solar panels in the future if needed. Since I did not use the OGT SAE port on the front box for my hard mounted panels, I can easily connect another panel or two, or even a suitcase style system, by using a MC4 to SAE adapter.
After installing these solar panels, there are a couple of things that I would do slightly different.
First I would have simplified my mounting system. There is no need to use the T Slots and they actually make things a little more difficult then it needs to be. I thought the ability of the bolts to slide would make it easier to align them with the holes in the panel frames. If I did it again, I would simply cut a notch in the aluminum angle and just bolt the frames directly to that. Tightening the nut on the bolt would be enough to clamp the panel to the aluminum angle. I might cut the notch at a 45° angle going towards the front of the trailer. That way if the nuts were to come lose going down the road, the wind would have to lift the panel up and move it forward (against the wind) before they could come lose from the mounts.
The second thing I would do is put some wire loom over the solar cables, just so they do not stand out so much on the trailer. I might still go back and do this as a winter project.
6 comments